Posts Tagged food blog

Happy Thursday: Grapesicles!

image

This past weekend I had the pleasure of hosting a birthday party for my favorite little two year old, Lillian. Not having kids myself, I wasn’t sure what to snacks make for a child’s birthday party… but then I saw these gems on Pinterest. Grapesicles! So pretty and so clever.

To make these darling grapesicles, I simply skewered red and green grapes and froze them. They take an hour or two to freeze completely, but that’s really all the time they require. Easy as pie. I did make sure to cut the sharp ends off the skewers. I didn’t want to be “that girl” – you know, the one girl who doesn’t have children who then gives all the kids sharp skewers so they can poke their eyes out? No thank you.

And let me just say…the grapesicles were a hit. The kids quickly figured out that the grapesicles were tasty and they could also double as swords. It was a win-win situation for all. I refrained from using my grapesicle as a sword, but I did eat one or two (or three or four) and enjoyed every delicious icy bite. Move over, popsicles. Frozen grapes are my new best friend.

Life’s Simple Pleasures: Salted Molasses Butter

This isn’t really a recipe post, it’s more of a revelation. It’s a post about the simple pleasures in life, and about taking the time to enjoy them.

Last night, Nich was working late and I was home by myself. I had a lot of things to get done and I was generally feeling overwhelmed by life. As I stared at the sink full of dirty dishes before me, I made a choice to stop for a moment. I actually took time to sit down and eat a proper dinner. I turned off the TV, poured myself a glass of bubbly, and ate one of the best meals I’ve had in awhile. It was just what I needed.

For those curious, my dinner consisted of a baguette with salted molasses butter and a roasted beet salad. I’ll write more about salad in a few days (it was really good), but today I’m going to keep it simple. I’m just going to tell you that you need to make some salted molasses butter. Whip up a batch this weekend, spread it on a crusty baguette, and eat to your heart’s content. You’ll thank me for it.

And in case you’re wondering…salted molasses butter is every bit as simple as it sounds. Mix together softened (unsalted) butter, molasses, and kosher salt. That’s really all there is to it. (Oh, and a big thank you to Jennifer Perillo at Simple Scratch Cooking for the idea in the first place.)

So, here’s to a lovely weekend full of simple pleasures. I’m going to do my best to take the time to enjoy them, and hope you all can do the same. Happy Friday!

(p.s. I didn’t realize until just now that the salted molasses butter looks strangely like peanut butter?)

Recipe Swap: Strawberry Champagne Jam and Thumbprints

It’s recipe swap time again!

For those of you who are unfamiliar, this recipe swap is the brain child of Christianna at Burwell General Store. Every month, she selects one recipe from a vintage cookbook and sends it out to a group of food bloggers from all over the world. We’re each asked to reinterpret the recipe however we see fit, and then we all post our recreations on the same day.

For this swap, CM picked the old time recipe of Jelly Cake.

As I’ve said before a million (billion) times, I’m not a big sweets person. But, for the life of me, I couldn’t think of a savory application for Jelly Cake. My thoughts drifted to summer berries, jams, preserves, and syrups. CM specifically told us she picked this recipe in hopes that we’d be inspired by summer preserves, and she was spot on. I was THRILLED to have an excuse to make jam!

So when I saw that strawberries were still very much in season here in Oregon, I promptly bought a flat of strawberries from my farmer’s market and invited myself over to my mom’s house for a day of canning. I grew up making jam with my Grandma, and I must admit that my Grandma’s strawberry freezer jam is one of the best things I have ever, ever tasted.

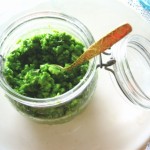
But, for whatever reason, this time I didn’t set out to make my Grandmother’s jam. I think I was too afraid of messing up her recipe. I was scared it wouldn’t taste like the jam I remember so fondly from my childhood! So, then, I decided put my own spin on my childhood favorite: I made Strawberry Champagne Jam with Thyme.

I wasn’t sure how the alcohol would work with the jam, but I decided to give it a shot. I’d seen a few recipes online (so I knew it was possible), and it just sounded like such a wonderful combination. I worried and fretted as I made the jam, hoping that the champagne wouldn’t keep the jam from setting up properly. I stared at the jars of jam as they cooled, willing them to set up properly. When I opened up a jar the next day, I was pleased to see the jam had set up nicely. I was even more pleased to discover that the jam tasted fantastic. However, I was totally and completely taken aback by the fact that his jam somehow tasted exactly like my Grandma’s strawberry jam. Let it be known that my Grandma does not put champagne or thyme in her jam. I have no idea how my jam ended up tasting so much like hers! There isn’t a lot of thyme or champagne in the jam, so I think these flavors paled in comparison to the natural fruity flavors of the strawberries. Try as I might to make my own version, I still ended up with a jam that was a lot like my Grandmas. I couldn’t be happier!

So, then, what do you do when you have 11 jars of delicious strawberry jam? First, you spread some on a piece of toast and happily devour it. Then, you make another piece of toast and devour that piece as well. Then, you give away a couple of jars to your friends and family.

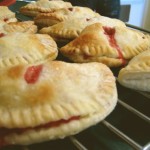
Then…you make jam thumbprints!

I love thumbprint cookies, and this seemed like the perfect way to feature the jam. In addition, this cookie is such a classic old recipe, and it really seemed to fit well within the realm of jelly cake. The cookies were bright, fun, flavorful, and captured so many of my favorite flavors of summer.

As always, I had a great time participating in the recipe swap. I am thankful to Christianna for giving me the excuse to make my first jam of the summer (there will be many more to come, I hope!). Make sure you stop by the Recipe Swap page at Burwell General store, and be sure to visit all the other fantastic blogs to see what they came up with for the swap!

Strawberry Champagne Jam with Thyme
(Adapted from Recipe Circus)

(Note: The champagne and thyme flavors are very subtle in this jam. Feel free to experiment with the measurements to reach your desired flavor profile. Also, this jam is a bit runny. If you want a firm jam that sets up completely, I would suggest omitting the champagne.)

Ingredients
4-1/2 to 5 cups strawberries
1 pkg. (3 Tablespoons) pectin
1/4 cup lemon juice
1/2 cup dry champagne
6 cups sugar
2 teaspoons fresh thyme, minced

Method
In a large pot or stock pot, combine berries, pectin, lemon juice, thyme and champagne. Cook on medium-high heat and bring the mixture to a rolling boil. (Note: the mixture will bubble and foam and will triple in size. If you’re afraid it will boil over, feel free to scrape off some of the foam).

Once boiling, add sugar and stir constantly until mixture comes to a rolling boil again. Boil, while stirring, for 1 to 2 minutes. Remove from heat and immediately ladle into clean, hot jars.

Invert jars after applying lids and let set for a few hours before processing for 10 minutes in a boiling-water bath. (The original instructions call for this step, but I was in a hurry so I skipped the inverting part and went straight to the hot water bath).

Strawberry Jam Thumbprints
(Makes 2 dozen cookies)

2 cups all-purpose flour
1 cup ground (toasted) almonds
8 ounces butter (2 sticks), room temperature
3/4 cup sugar
1 teaspoon vanilla
The zest of 1 lemon
2 teaspoons fresh thyme
pinch of salt
2/3 cup strawberry jam

Preheat oven to 350 F. Line two baking sheets with parchment or silicone liners.

In a mixing bowl or the bowl of a stand mixer, cream butter with sugar and vanilla until light and fluffy (5 mins). In a food processor or blender, grind almonds, thyme and lemon zest together until the almonds mixture is finely ground.

In a separate small bowl, Whisk together flour, ground almonds, and salt. Stir flour mixture into the butter mixture until combined. Refrigerate dough for 20-30 minutes before shaping.

Using a teaspoon (or your hands), form small balls and place on cookies sheets, evenly spaced apart. Using your thumb, make indentations in the cookies, creating a well for the jam. Fill each cookie well with strawberry jam.

Bake for 15 minutes, or until the cookies are just barely browned around the edges. Allow to cool on a wire rack. The cookies should be crumbly, buttery (and fabulous)!

Fennel and Kale Meatloaf (with Bacon)

There are two main factors that contributed to my decision to make meatloaf in the middle of the summer:

1. The overabundance of kale in my garden.
2. The meatloaf pan my father-in-law gave me for Christmas.

I really wish I could just leave it at those two (odd) reasons, but I feel that I should provide you with somewhat of an explanation.

As for the kale, I feel it (mostly) explains itself. The stuff grows like weeds. Try as I might, I just cannot keep up with it. I’ve eaten kale with cheesy polenta. I’ve eaten kale in a raw kale and apple salad. I’ve thrown kale on a pizza. I’ve used kale in pesto. I’ve taken to giving away bags of kale to my friends. And, still, the kale keeps on comin’…

So, it should go without saying that I’m always on the lookout for clever kale recipes. When I stumbled across Good Stuff NW‘s recipe for Kale and Fennel Meatloaf, I felt like I hit the recipe jackpot. Not only did it incorporate kale, but it gave me a chance to use my meatloaf pan.

This brings me to the second reason I made this meatloaf: the fact that my father-in-law bought me a meatloaf pan for Christmas and I had yet to blog about meatloaf! I think this makes me a bad daughter-in-law (I kid, I kid). To be totally honest, I’ve made meatloaf a few times since receiving the meatloaf pan, but I hadn’t gotten around to actually posting any meatloaf recipes. Let’s be honest…while meatloaf is one of the tastiest comfort foods of all time, it isn’t exactly pretty to look at or photograph. Since meatloaf is so very un-pretty, I haven’t exactly been inspired to blog about it. Until now, that is.

But, let’s rewind a second. You’re probably still wondering what on earth a meatloaf pan actually is.

I wondered the exact same thing the first time my father-in-law told me about one. He told me (in no uncertain terms) that every chef must own a meatloaf pan. I’d never heard of such a thing, much less purchased one. And then he gave me my very own meatloaf pan for Christmas and my eyes were opened. Essentially, it is a pan within a pan. Let me show you:


(Image courtesy of HarrietCarter.com)

As you can see, the inner pan rests inside a larger outer pan. The inner pan has handy holes which allow the grease to drain out of the meatloaf and into the outer pan. This ensures that the meatloaf cooks evenly and quickly, and the end result is a moist meatloaf that isn’t overly greasy.

However, like the great Alton Brown, I am not a proponent of single task kitchen gadgets. I hate things that take valuable drawer space and only do ONE thing, i.e. strawberry hullers, garlic presses, etc. So, I can’t in good conscience go tell you all to go buy a meatloaf pan. It is quite singular in its purpose. For the sake of argument, though, I will say that the outer pan could easily double as a bread pan (when it isn’t catching your meatloaf drippings). And, this was the best darn meatloaf I have ever eaten, and I feel I owe it all to the magical meatloaf pan. So take it for what you will.

So, a big thank you to my father-in-law for the gift of a meatloaf pan. And thanks to Kathleen from Good Stuff NW for giving me a fabulous meatloaf recipe to try (and tweak). I could not have been happier with the end result.

Fennel and Kale Meatloaf with Bacon
(Adapted from Good Stuff NW)
Serves 4

Ingredients:
1 onion, finely diced
3 cloves garlic, minced
1 fennel bulb, finely diced
2 c. kale, sliced into chiffonade
2 lbs. ground beef
6 strips bacon, cut into 1/4″ pieces
1 egg
1/2 c. milk
1/2 c. bread crumbs
2 teaspoons Worcestershire sauce
1 Tablespoon tomato paste
1 tsp. salt
1/4 tsp. pepper
1 Tablespoon minced fresh rosemary
1 teaspoon fresh minced herbs: I used fresh oregano and dried basil (use whatever you’ve got on hand!)
1 Tablespoon pork lard/fat*

*Note: traditional meatloaf recipes call for a mixture of ground beef and ground pork or sausage. I didn’t have ground pork or sausage so I substituted bacon and pork fat. It worked out wonderfully.

Method:
Preheat oven to 350°.

In a large frying pan or skillet, cook bacon pieces over medium heat until crispy. Remove bacon from pan, set aside to cool. Pour off excess bacon fat into a container, set aside for use in the meatloaf. Leave 1 Tablespoon of bacon fat in the pan.

Return pan to heat, and cook onion, garlic and fennel bulb in bacon fat for 2-3 minutes. Add in kale and continue to cook, until vegetables are soft and the kale is wilted (5 minutes). Remove from heat, and allow mixture to cool.

Combine ground beef, egg, milk, bread crumbs, salt, pepper, Worcestershire sauce, tomato paste and herbs in large mixing bowl. Add in bacon pieces and stir in reserved bacon fat. Gently using your hands, mix in the fennel and kale mixture, until everything is combined. Gently press into a meatloaf pan or bread pan (or form into a loaf and place on a baking sheet).

Bake 45 minutes to an hour, or until a thermometer inserted in thickest part reads between 140-150°. Remove from oven, tent with foil, and allow to rest for 10-15 minutes before serving.

Serve with mashed potatoes (or whatever else you want to eat it with!). I doused my slice of meatloaf with just a dash of Lucille’s BBQ sauce.

This Time Last Year: My Favorite Summer Recipes

It seems especially cruel to post a roundup of summer recipes on a muggy, cloudy day in Portland, Oregon. My heart knows that it’s summer, but my eyes tell me otherwise. It’s all doom and gloom today, folks.

But, whether or not it actually feels like summer in Portland, the truth is that it is summer. We’re coming upon the 4th of July weekend, and (fingers crossed!) the forecast looks downright delightful. I couldn’t be happier. I plan on spending a lot of time in the sunshine, eating bratwurst, grilling asparagus, drinking sangria, and having a darn good time. That’s what freedom is all about, right?

So, then, since I’m getting into the spirit of things I thought I’d post a few of my favorite summertime recipes. These are recipes that I keep going back to, again and again (and again). I discovered each of these recipes last summer, and I will admit that I’ve been thinking about them ever since. It was a long and dreary winter, and I am so excited that summer – and all of the seasonal produce that comes with – has arrived. It’s been a long wait, but it’s worth it.

So, happy summer everyone!

My Favorite Summertime Recipes
(Listed Clockwise from the Top Left)
1. Slow Cooker Carnitas
2. 24 Hour Dill Pickles
3. Cabbage Slaw with Fennel, Apple, and Jalapeno
4. Potato Salad with Yogurt, Arugula and Dill
5. Strawberry and Goat Cheese Hand Pies
6. Smashed Pea and Mint Pesto

Happy 4th of July!
-Lindsay

Sriracha & Blackstrap Molasses Pulled Pork

June is just one giant party after another.

While I’m trying to catch my breath from the madness of May (which includes Mother’s Day and my dad’s birthday), June comes along with Father’s Day (June 19), my mom’s birthday (June 18), my parent’s wedding anniversary (June 3), and my own wedding anniversary (June 20).

There’s just so much to celebrate!

So, rather than try to celebrate each individual event, my family decided to have one celebration that would cover all the various birthdays and holidays. Originally, our plan was to BBQ and laze about in the sun and eat delicious food together. There was talk of ribs and homemade ice cream! But, the Portland forecast had other ideas. The weather this past weekend was quite lame, to say the least. A BBQ was not in the cards.

But, I wasn’t willing to let the weather win. I was feeling sassy and summery and so I decided to make pulled pork sandwiches. Pulled pork has all the flavor and attitude of BBQ, but can be done indoors with a slow cooker. Done and done.

I’ve made pulled pork a few times over the years and it is always a hit. It’s one of those dishes that is hard to screw up. Throw some pork in a slow cooker, add some seasonings, and walk away for 8 hours. That’s my kind of cooking!

Since I was making the pulled pork for a special occasion, I wanted to jazz up the recipe a bit. I’m not a big fan of ketchup (OK, I think it’s nasty), but a lot of pulled pork recipes use ketchup as part of the sauce base. I was in need of an unconventional and ketchup-free pulled pork. So, I turned to my trusty pantry to see what I could find. I was in luck! I had a few key pantry staples on hand that I knew would work together to make a fabulous BBQ sauce: tomato paste, Sriracha, and blackstrap molasses. The tomato paste would bring the tangy tomato element we’re all used to in BBQ sauce, the Sriacha would add heat, and the molasses would add depth and sweetness.

So, I went for it. I threw it all in a crock pot, walked away for hours, and crossed my fingers that would all work. Thankfully, it did work. It was absolutely and positively delicious. It was everything pulled pork should be – spicy, complex, sweet, smoky, and flavorful. My family and I happily devoured our pulled pork sandwiches (and cole slaw, and potato salad, and cantaloupe, and strawberry shortcake…) and thoroughly enjoyed our celebration of all June holidays. What can I say? I’m a lucky lady. So much to celebrate, and so many wonderful people to celebrate with.

So, here’s to you, June. Here’s to wedding anniversaries, fathers, mothers, celebrations, and a big batch of pulled pork.

Blackstrap Molasses & Sriracha Pulled Pork
(Serves 6)

1 yellow onion, sliced thinly
3-4 lbs pork shoulder

Sriracha & Blackstrap Molasses BBQ Sauce:
1/2 cup tomato paste
1/2 cup apple cider vinegar
1/4 cup blackstrap molasses
2 teaspoons Sriracha hot sauce (more/less depending on how much spice you want)
1 teaspoon ground mustard
1 teaspoon freshly ground black pepper

Spice rub:
1 Tablespoon brown sugar
1 teaspoon smoked paprika
1/2 teaspoon cumin
1/2 teaspoon black pepper
1 Tablespoon salt
Dash of cayenne pepper

Method:

Prepare the pork: Mix all spice rub ingredients together in a small bowl. Rub the outside of the pork with the spices, and allow to sit in the fridge for at least 1 hour before cooking (can do this the night before).

Slice the onion thinly, and place most (3/4) of the onion slices in the bottom of the slow cooker.

Cut pork shoulder down into large chunks (2-3 inches) and trim off any excess fat. Place pork pieces atop the onion slices in teh slow cooker. Toss the last onion slices on top of the pork.

Meanwhile, whisk together sauce ingredients: tomato paste, cider vinegar, molasses, Sriracha, ground mustard and black pepper. Pour 1/2 of this mixture over the pork in the slow cooker, reserving the rest of the sauce mixture for later. Cook pork on low heat for 8 hours (Note: I started my pork at 9:30am and needed it to be done by 4 pm. I cooked it on low all morning, but at 2pm I turned the heat up to high.)

When the pork is ready, it should be falling apart and ‘fork tender’. Remove pork (and onions) to a bowl. Discard gristle and shred the pork with 2 forks until desired consistency. Pour any liquid left in the crockpot into a jar, skimming off any unwanted fat. Once the pork has been shredded, place back in the crockpot. Stir in the reserved Sriracha BBQ sauce with the pork. Pour back in some of the cooking liquid, until the pork is moist and juicy.

Serve with yummy buns/bread, coleslaw, and whole grain mustard. (YUM.)

*Note: While the recipe does not start with much liquid, you’ll find the end result to be very moist. As the pork cooks down, it simmers in its own fat and juices. I found there was almost too much liquid, hence why I removed the pork from the liquid and then poured back in the desired amount of liquid. This ensures that you don’t end up with soupy pulled pork sandwiches!

Radish Leaf Pesto Pasta Salad

For whatever reason, I’ve had a really hard time writing this post.

It definitely isn’t due to lack of effort. Quite the contrary, I’ve sat down to write this post many, many times. But every time I turn on my computer and attempt to write about this radish leaf pesto…I simply draw a blank. I try to will my brain to come up with the words, but my brain keeps telling me that it would rather look at pretty things on Pinterest. Apparently, I can’t will my own brain into submission.

All that to say, it would appear that I’ve got a case of writer’s block. It happens to the best of us. I think that I’ve had a hard time writing this recipe because, well, it isn’t really a recipe. Pesto is one of my favorite things to make, for this very reason. There isn’t any one right way to make it, and there are no hard and fast rules for pesto-making. Pesto can take on many different forms, depending on the mood and ingredients at hand. The very freedom I feel in making pesto is the very thing that makes it so hard to write about.

Since I’m having trouble finding the words, I’ll just say this: pesto = greens + garlic + hard cheese + nuts.

It’s as simple as that. To be clear, pesto is traditionally made with basil and pine nuts. But by no means am I traditional, and therefore my pesto tends to skew the same way. Depending upon what I find in my fridge, I’ll make pesto with any combination of the following ingredients: parmesan, pine nuts, hazelnuts, arugula, cilantro, asiago, beet greens, basil, mint, parsley, pecorino romano, almonds, walnuts, and more. There are countless ways to make pesto, it all just depends on what you like (or what you have on hand).

Seeing as this is the season for all things green, I find myself making pesto all the time. My garden and fridge are currently overflowing with leafy greens, and as much as my bunny would love to devour all my extra greens, I usually break his little heart and make a giant batch of pesto instead. Pesto is a fantastic way to reduce waste and use greens before they go bad, and pesto can easily be frozen and then thawed for later use. It just might be the perfect food.

However, in all of my years of pesto-making, it had never dawned on me to use radish leaves. In fact, I’m rather embarassed to admit that it had never occurred to me that you can eat radish leaves (On the same note, I recently saw a recipe for pesto using carrot greens. Genius!). I give all credit for this idea to Portland’s own Chef Vitaly Paley, who recently competed against Chef Garces on Iron Chef America’s “Battle Radish”. During the battle, Chef Paley whipped up many amazing things, including a radish leaf pesto. Even the usually unflappable Iron Chef judges were amazed by his use of radish leaf. It was such an inventive way to use the entire vegetable, as opposed to just throwing the greens away. Chef Paley made all us Portlanders proud! (Note: Chef Paley also won Battle Radish)

It goes without saying that the next time I bought radishes from the farmer’s market, I came straight home and made a batch of radish leaf pesto. It was everything I hoped it would be! The radish leaves lend a little kick of spice to the pesto, and they give it an especially vibrant bright green color. Honestly, I’ll never look at radishes (or their leaves) the same way again. They are a versatile and delicious little vegetable.

(And would you look at that? I see a lot of words on this here page. Maybe I don’t have writer’s block after all!)

RADISH LEAF AND HAZELNUT PESTO PASTA SALAD

Note: When I make pesto, I don’t measure anything. I usually start by throwing a few cloves of garlic in the food processor. Then, I’ll add greens and nuts. Then olive oil, lemon juice, salt, pepper, and a few red pepper flakes. I keep blending and adding olive oil and/or lemon juice, until the pesto looks right to me. I happen to like a nice, thick pesto that isn’t too heavy on the olive oil. The following measurements are a set of rough guidelines, so feel free to alter the amounts in any way you see fit.

For the radish leaf pesto:
1 large bunch of radish leaves, washed and patted dry (radishes set aside for use in pasta salad)
3 heads of green garlic (or 3 cloves of normal garlic)
1/2 cup toasted hazelnuts
1/4 cup grated parmesan cheese
1/4 – 1/2 cup olive oil
Salt & pepper, to taste
2 Tablespoons lemon juice
Dash of red chili flakes
1 large handful of fresh basil leaves* (or any other leafy green you have on hand)

*Note: I was making a rather large batch of pesto, so one bunch of radish leaves wasn’t going to cut it, hence why I added in basil. You could easily double the amount of radish leaves for a larger batch, but I only had the one bunch on hand.

Method: Mince garlic using a food processor. Add in nuts, radish leaves, basil, and lemon juice. Blend until combined. Add olive oil in small amounts, until you reach desired consistency. Season with salt, pepper, chili flakes, and extra lemon juice (if so desired). If not using immediately, refrigerate until use.

For the pasta salad:
1 small bunch of asparagus
1/4 cup freshly shaved parmesan cheese
1 lb fresh pasta of your choosing
1/2 cup low fat Greek yogurt
1/2 – 1 cup radish leaf pesto
1 cup baby arugula
Radishes, washed and sliced thinly

Method:

Cook pasta according to package directions. Drain pasta water and set pasta aside to cool.

Snap the ends off the asparagus. Bring a small pot of lightly salted water to a boil. Meanwhile, prepare an ice bath. When the pot of water is boiling, add asparagus. Allow the asparagus to cook for 2 minutes. After 2 minutes, remove the asparagus from the boiling water and immediately plunge into the ice bath. Once the asparagus has cooled (a few minutes), remove it from the ice bath and cut into 1″ pieces.

Toss cooled pasta with a drizzle of olive oil. Stir together pesto and Greek yogurt, then toss yogurt and pesto mixture with the pasta. Gently stir in parmesan cheese, sliced radishes, asparagus and arugula. Allow to chill at least 20 minutes before serving, as this will allow the flavors to meld.